Showing posts with label Geek. Show all posts

Thursday, 2 November 2017

Down the Rabbit Hole


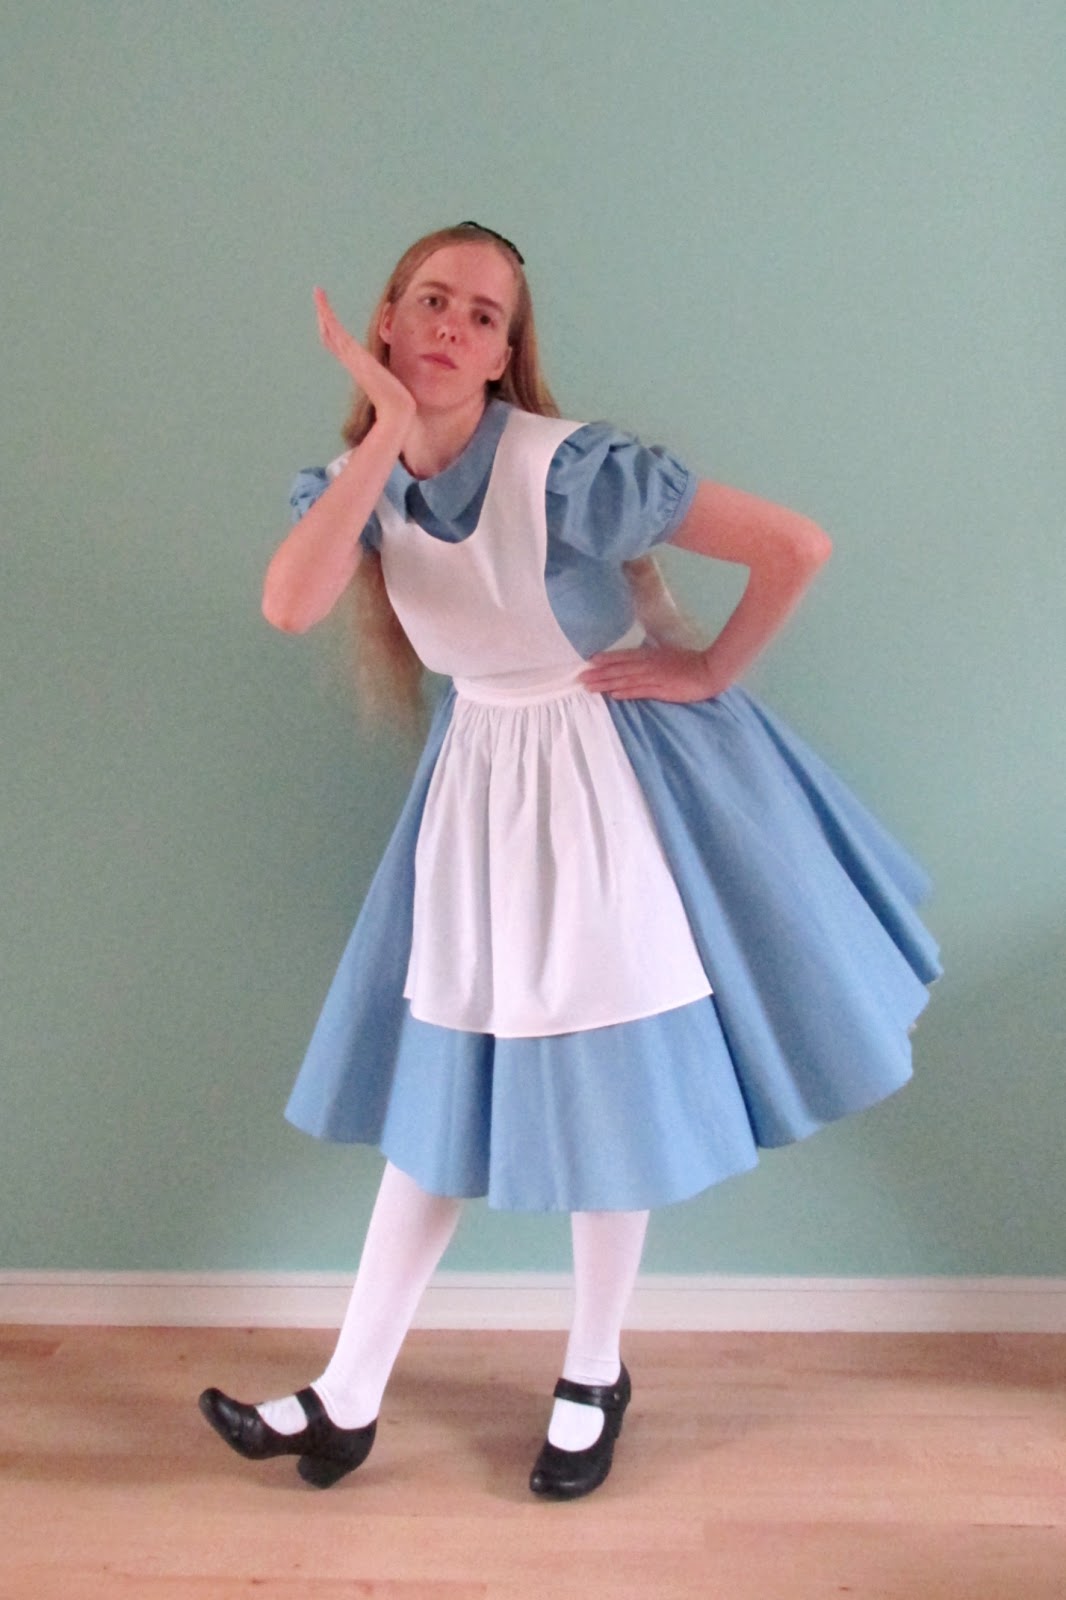
In the spirit of Halloween, I'd like to show you a cosplay I finished back in February. It also just happened to be what I chose to wear for my Halloween Tea Party on Tuesday.

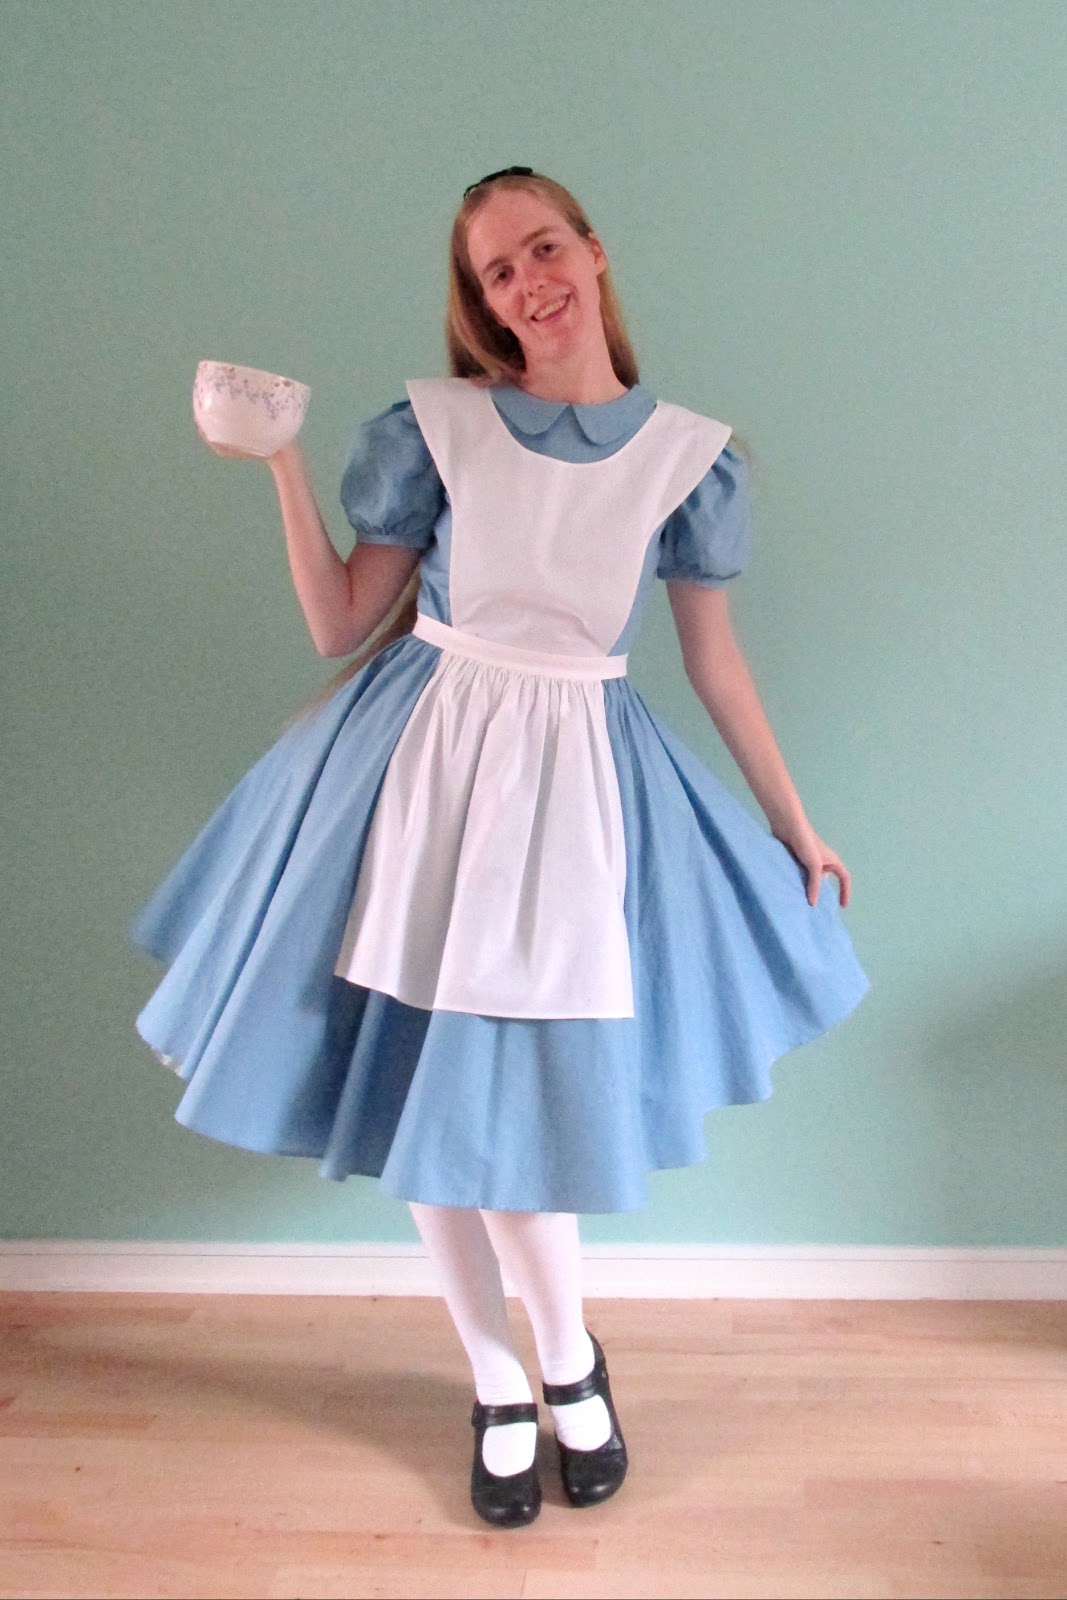
This is my first ever cosplay, and I went sweet and simple with Alice from Disney's adaption of Alice in Wonderland. To be even more precise, this is a cosplay of the costume that Kathryn Beaumont wore for the live-action filming that the animators used as a reference while making the Disney Classic. I was lucky enough to find a collection of on-set photos of her here.


The bodice is a modified Christine Haynes "Emery" dress bodice. I made the neckline higher and drew a new collar for it. I also modified the sleeves to be puff sleeves.
I had muslined the pattern beforehand and made quite a few fit changes, but that will be a story for another day. The bodice is fully lined and closes in the back with an invisible zipper.

The skirt is a full circle skirt drafted from my hip measurement and gathered to fit the bodice.

Both the dress and apron fabrics are eco cotton broadcloth from Stoff&Stil in the colors "baby blue" and "white". I think I used 4 meters of blue and 1 meter of white.


The bib part of the apron was draped on my dress form, and the rest (belt, skirt, and bow) was just squares. All edges are hemmed with a double-folded baby hem. The bow is permanently attached to the belt, and it closes with 5 press studs hidden by the bow.

The stockings came from my 18th-century wardrobe and the headband is made out of a few pieces of fold-over-elastic. I am wearing both my 26-inch white petticoat and my 22-inch black petticoat with the dress, as well as a pair of drawers with elastic and lace at the hem. Unfortunately, I made the drawers about 5 cm too short, and they are only visible while twirling, jumping, etc.


So far, the cosplay has been worn for a Carnival party at Uni, as a Carnival helper at our community center, at Hydracon 2017 and for my Halloween Tea Party. I have felt very cute every time, and have gotten lots of compliments on it. 

I feel like my dress is very accurate to the original costume and the Disney movie, despite it being my first ever cosplay. I have been invited back to Hydracon next year and already have a gazillion ideas for more cosplays. I guess only time will tell if I will get something done in time?

Until next time, here is a picture with Alice and her beloved cat, Dinah, aka Marie.

/Angelica

Thursday, 21 September 2017

Sewing Statistics - Part I

So, I recently "inherited" this iPad 2 from my boyfriend. He had bought it used from my twin brother around Christmas 2 years ago and found that he just didn't use it enough. So I got to play around with it, MWAHAHAHA.

And what did this sewist do? Installed some nifty sewing apps, of course! And one of them was Cora.

Now, if you don't know Cora, it is most likely because you have Android on your phone. Me too. And Cora only works for iTunes/AppStore/Apple products. Like the iPad 2. Aha!

It is a fabric stashing app, where you can catalog your fabric and then browse through or search it. You can filter your stash by type, weight, wash status, star-markings or by the minimum length your next project will need. The fabrics are beautifully displayed and a long tap on the picture will show the photo in full size while a short tap will show all the details you cataloged it with, including type, fiber content, location, design, length, price, source, colors, wash status and more.


Now, I quickly got addicted to the Cora app. It does cost money to get past the first 5 fabrics added, but it has been worth every penny so far. And 251 fabrics later, I still love it!

It does have 1 little drawback, though. It will tell you just how much fabric you've REALLY got. And it told me that I got a total of 400 meters! Yikes!

At this point, I was halfway in denial. How the h*** do I have 400 meters of fabric?!!! Then, a week later, when the hard truth had settled in, I made a plan.

I will sew up, give away, sell or discard enough fabric, so that I reduce my stash to a total of 300 meters by September 1st, 2018. 
 
And then I went crazy in Microsoft Excell. I have charts and graphs for everything now, stash size, type, and color distribution and spreads just for planning makes and blog posts.

Let me show you :)


Above - stash data taken directly from the Cora app is put in and processed to give a net flux for each month as well as a total for the time period until Doomsday, aka Sep 1st, 2018.


Above - A stash size in meters over time plot with the pink being total, blue being wovens, purple being knits and light pink being others. The points at February and June shows "stash size goals".


Above - Fabric type distribution in stacked percentages. Purple is wovens, pink is knits and blue is others. I have no end goal for this one, I just thought it could be interesting to see. My mother has roughly the reverse distribution of knits and woven than me, for instance.


Above - Color distribution. I didn't know I had so much blue?


Above - A chart of finished make by garment type and recipient. The chart calculates a "selfish rate" that I'd like to keep around the 85-90% as well as a make count for the entire period for each garment type. Joost is the name of my boyfriend, BTW. 


Above - 2 graphs to visualize the makes chart. I love to see them grow as I type in my latest make. 


And lastly, my Makes Planner. The dark pink makes are finished. Light pink ones have been cut out and/or is in progress. White ones are only temporary plans. I love how I can move the cells around as plans change, and how I can see ahead to upcoming projects. It makes pre-washing fabric and buying notions so much easier to do in advance. 

I do find that having the Cora app and keeping detailed statistics keeps me more focused and thus more productive in my sewing. I get a little "kick" every time I get to downsize or delete a fabric, change the color of a cell in the Makes Planner and so forth. I am having way too much fun, people!

So, for now, I will keep the statistics going. I will return on September 1st, 2018 with more statistics, showing you how it all went. Wish me luck!


Thursday, 8 January 2015

Homemade Christmas: Nerdy Little Things

Me-made Christmas gifts for my little brother (left) and my twin brother (right).


We got our first Nintendo console in 1997. It was a N64, and it was glorious! We had just learned to ride our bikes, and as an extra encouragement, we each got to name ourselves a price. My brother chose the Super Mario 64 game for N64 and I chose these for PC.

The PC games didn't last long (my parents wouldn't let me get refills for the printable fabrics), but the love for Nintendo still lives on. Many games followed, but no game was more loved by my brother than Yoshi Story.


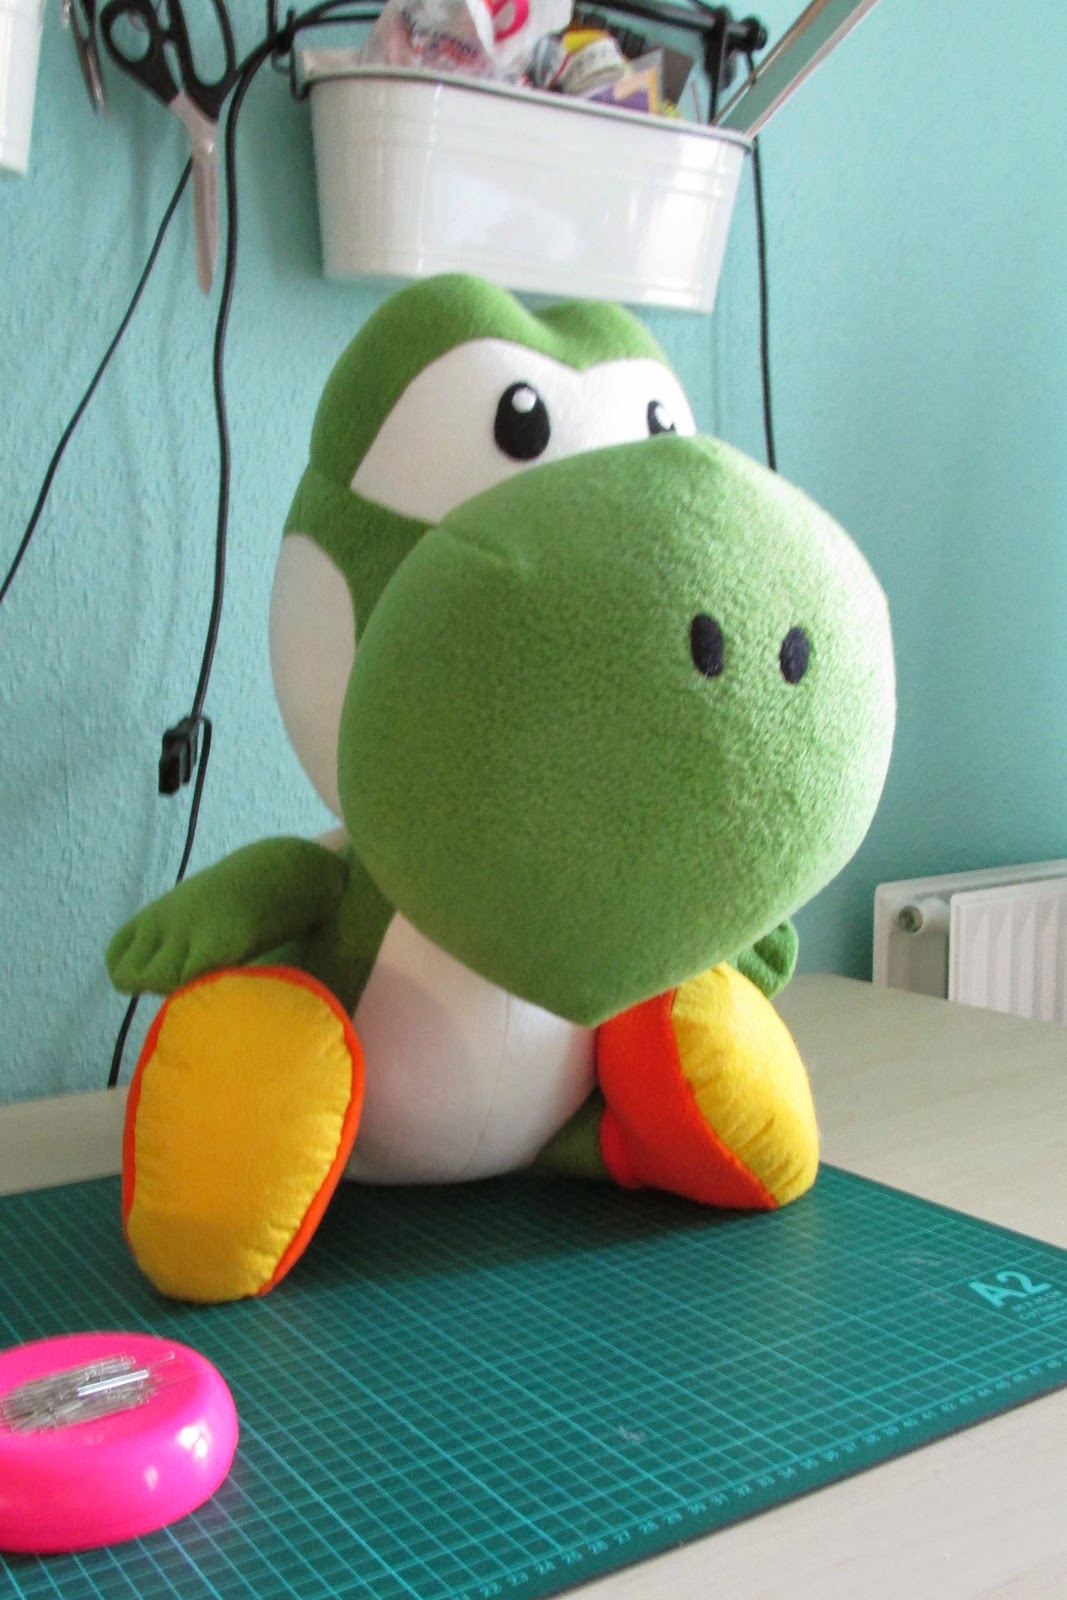
Yoshi has been his favorite Nintendo character ever since. So when I saw this Giant Yoshi Plush pattern and tutorial on Instructables, I knew I had to make it. It was meant to be. However, the finished Yoshi is well over a meter tall. I didn't want to commit to making such a large toy without consulting my brother first, so I scaled the large pattern down to app. 45-50% by printing 4 pattern pages on each A4 page. My finished yoshi is app. 45 cm tall.

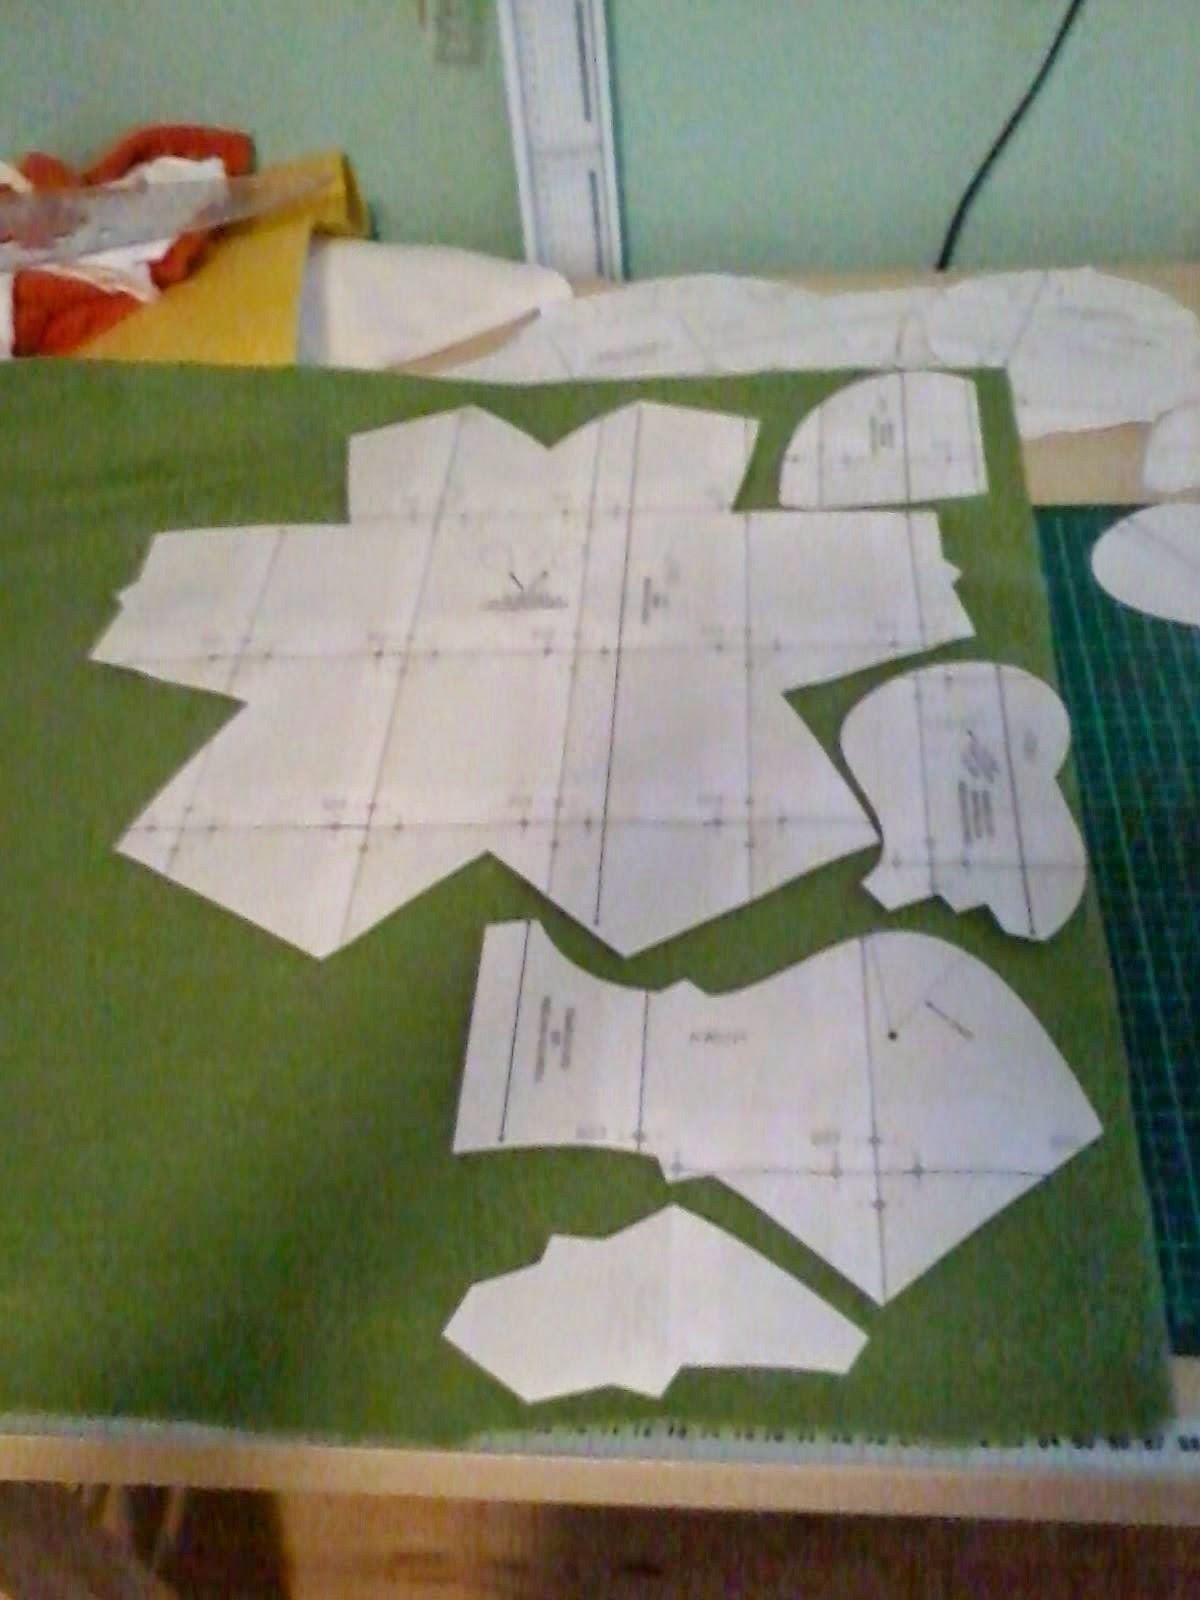
Crappy camera picture from cutting of the green fleece.

The fabric is all from Stof2000, a danish fabric chain store. I got 50 cm of green fleece, 25 cm of red, orange and white fleece and 50 cm of yellow felt (they didn't have yellow fleece). I used ALL of the green and white, but still have a lot of orange, red and yellow left over. The knit fabric and wool felt for eyes, nose and stuffing guards were all pulled from my remnants.

Front view. Metric cutting mat for scale. 

For stuffing, the content of 2,5 cheap Ikea pillows did the trick.  
I added little bags of rice in the hair, saddle and tail to weight him backwards and down. I should have added more to the hair or back head, as he tilts forward a bit due to his nose. 

Side view.

I sewed most of it by machine, but the sleeve-to-body and head-to-body seams were sewed by hand as they didn't fit into the machine. The eyes and nose were sewed on by hand. 

Back view. 

I am really happy to report that my twin brother absolutely loves it! I haven't seen him so happy or surprised for a really long time, and he has jokingly requested the whole range of Yoshis plus a full size green one.

Hand applique on pillow in progress. 

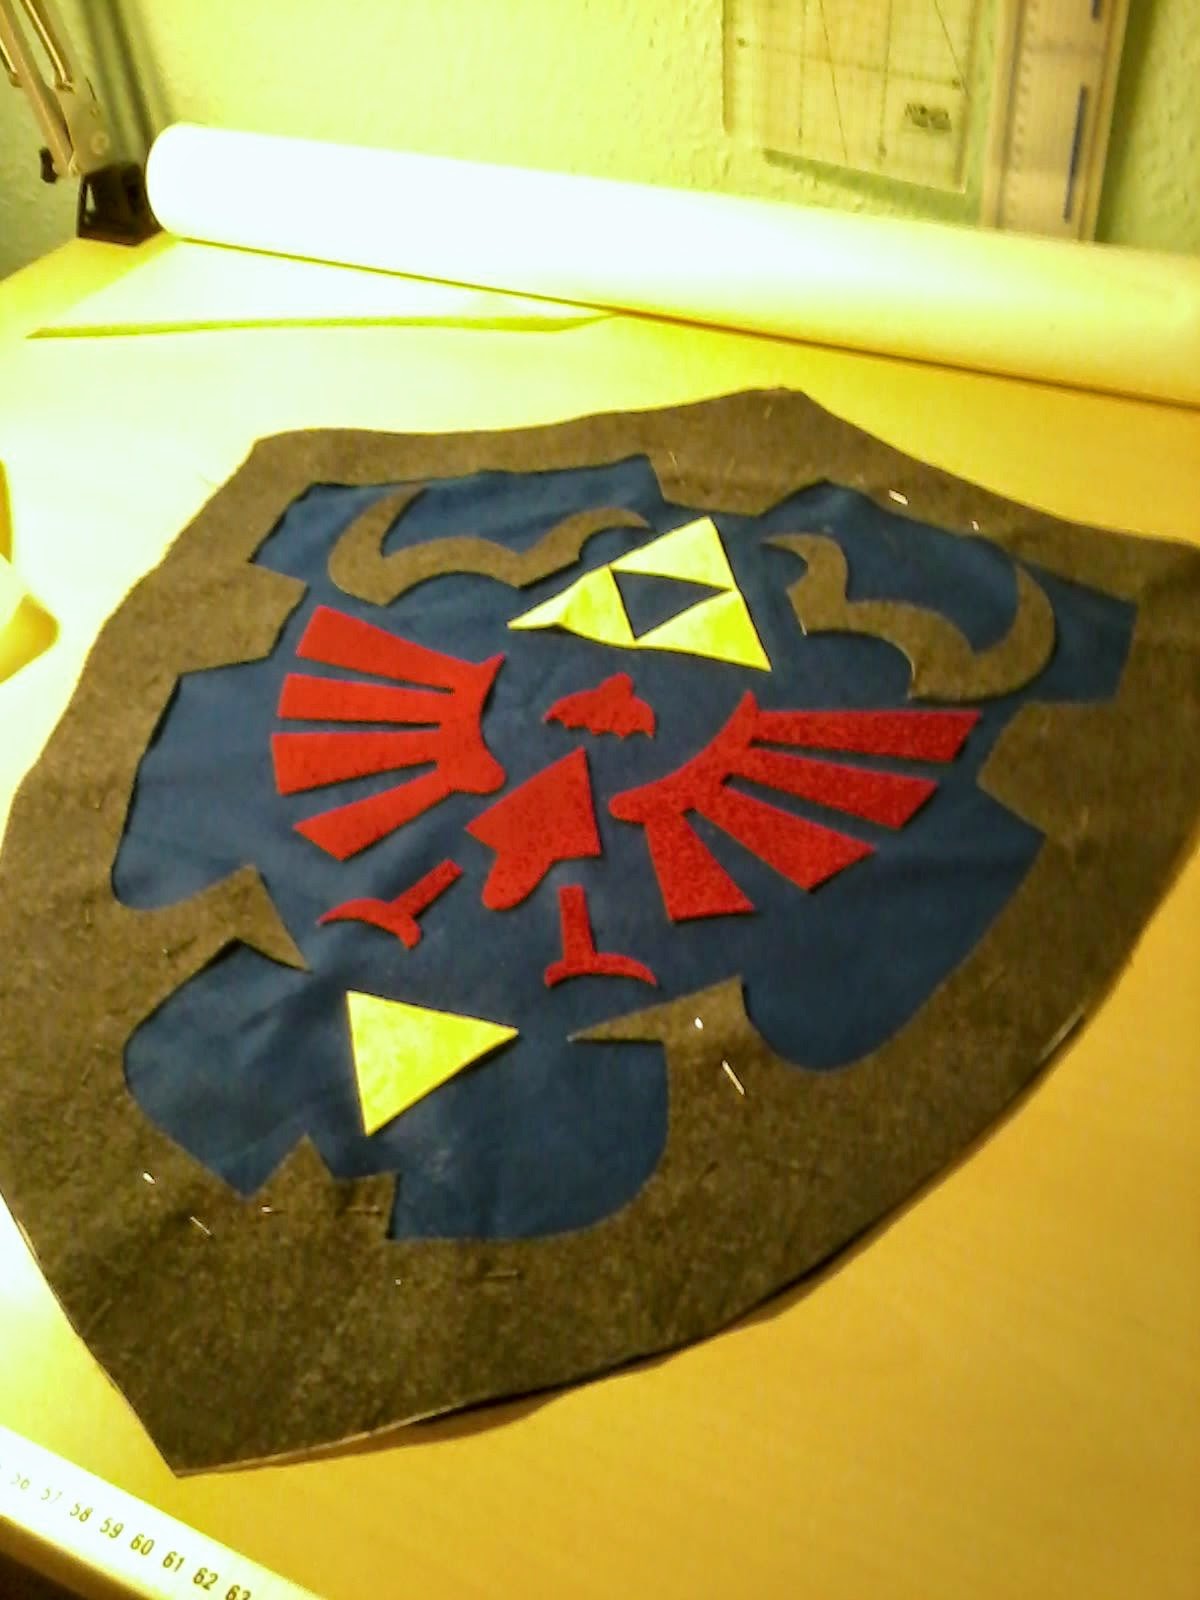
For my younger (and equally as nintendo-obsessed) brother, I made a Zelda shield pillow (see picture at the top of this post). He had written "Zelda merchandise" on his wishlist, so I tried to recreate this pillow, but in the Ocarina of Time design. The inside pillow case is made from unbleached muslin and the pillow cover is made from wool remnants. The blue is from a medieval heraldic surcotte, the red is from my boyfriends medieval tunic, the grey is from a second-hand skirt refashion gone wrong and the yellow is from an unused, disposable cleaning cloth.

Hand drawing the pattern and motifs.

I drew the shield shape and design by hand on pattern vlies (swedish tracing paper?) and used iron-on interfacing on the shield rim and motifs. I did all the appliqué by hand with small, even fell stitches.
The cover closes in the back with a wide lapped zipper. The pillow is stuffed with the remaining half Ikea pillow left over from the Yoshi.

My younger brother was happily surprised with his pillow and actually slept on it on Christmas eve. He has *also* requested more, as he would like to have all 3 shield designs from OoT. My twin brother has also requested a pillow, but he first wants it AFTER his red yoshi.

It is tough to have brothers sometimes ;)