Showing posts with label Stashbusting. Show all posts

Saturday, 6 January 2018

2018 Re-Sew-Lutions

Happy New Year, Dear Reader!

New Year is a time to reflect on the passing year and looking a head to the new year, setting up goals and resolution. On wednesday, I showed you my Make Nine collages for 2017 and 2018. Today, I am back with my Re-Sew-Lutions for the new year.

I am not good at keeping up with challenges that require you to make something on a monthly basis to fit a particular prompt. Therefore, I will not try to participate in the Historical Sew Monthly or the Sew My Style challenges this year, but have set some more universal reSEWlutions.

So, without further ado, I'd like to present my reSEWlutions for the coming year:


1) No Buying RTW Clothing! Sew All The Things!

I have joined Sarah Gunn of Goodbye Valentino and about 1000 other sewists for the 2018 RTW fast and mean to keep to it. It is a sewing community set up to support each other in sewing your own clothes instead of buying RTW, pushing yourself to learn new techniques on the way and to save money.


2) Sew With What I Have!

The stash-downsizing is not going too well. Since September, I have added about 50 meters of fabric from various sources and have only sewn about 40. As a result, I now have more fabric than when I started, about 410 meters. 110 meters to go before September 1st!

I will not but a direct ban on myself, but I will be more conscious about what I add and perhaps spend my fabric-money on patterns, better notions and tools instead. Also, I will clean out my stash around Easter, when my sewing room gets a fresh paint-job.


3) Sew More For My Boyfriend!

Like so many other seamstresses, I am notoriously bad at sewing for my significant other. Inspired by the Love To Sew podcast episode where Caroline and Helen interviewed their husbands, I am in the process of sewing my boyfriend a pair of True Bias Men's Hudson Pants and hope to follow up with a few sweaters, hoodies, boxers, chinos and dress shirts.


And that's it for my resewlutions! I hope you have had a nice start to your 2018. I will be back shortly with another make. In closing, here is my #2017BestNine from Instagram:


Monday, 18 December 2017

Winter Roses


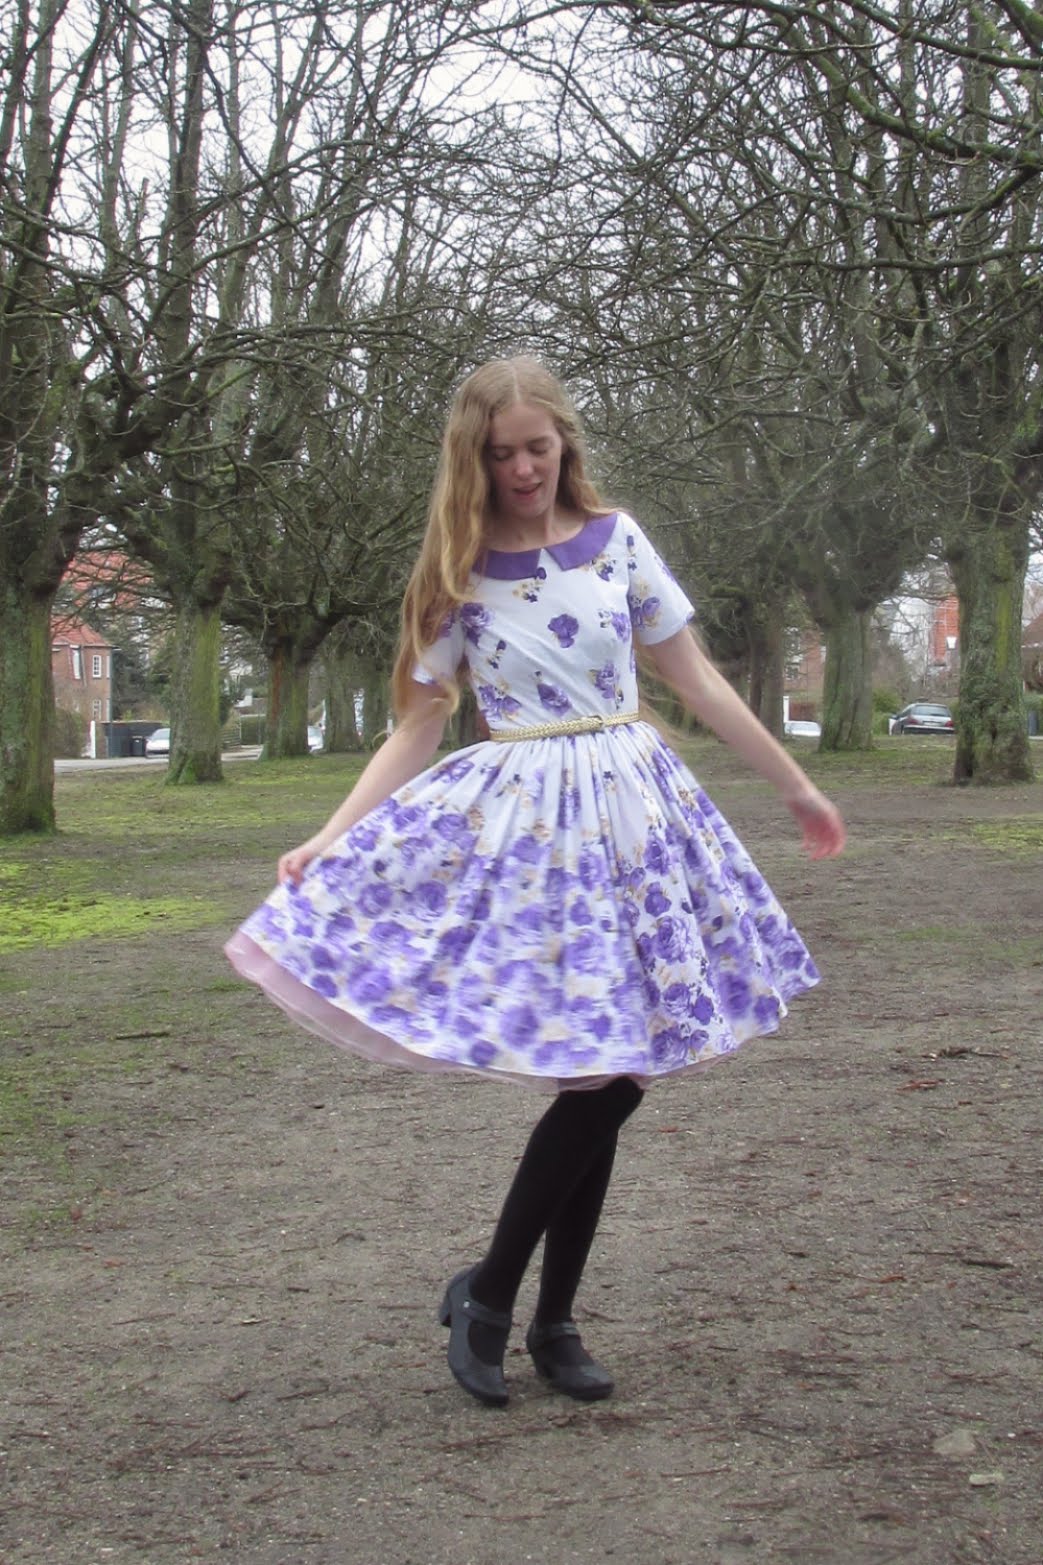
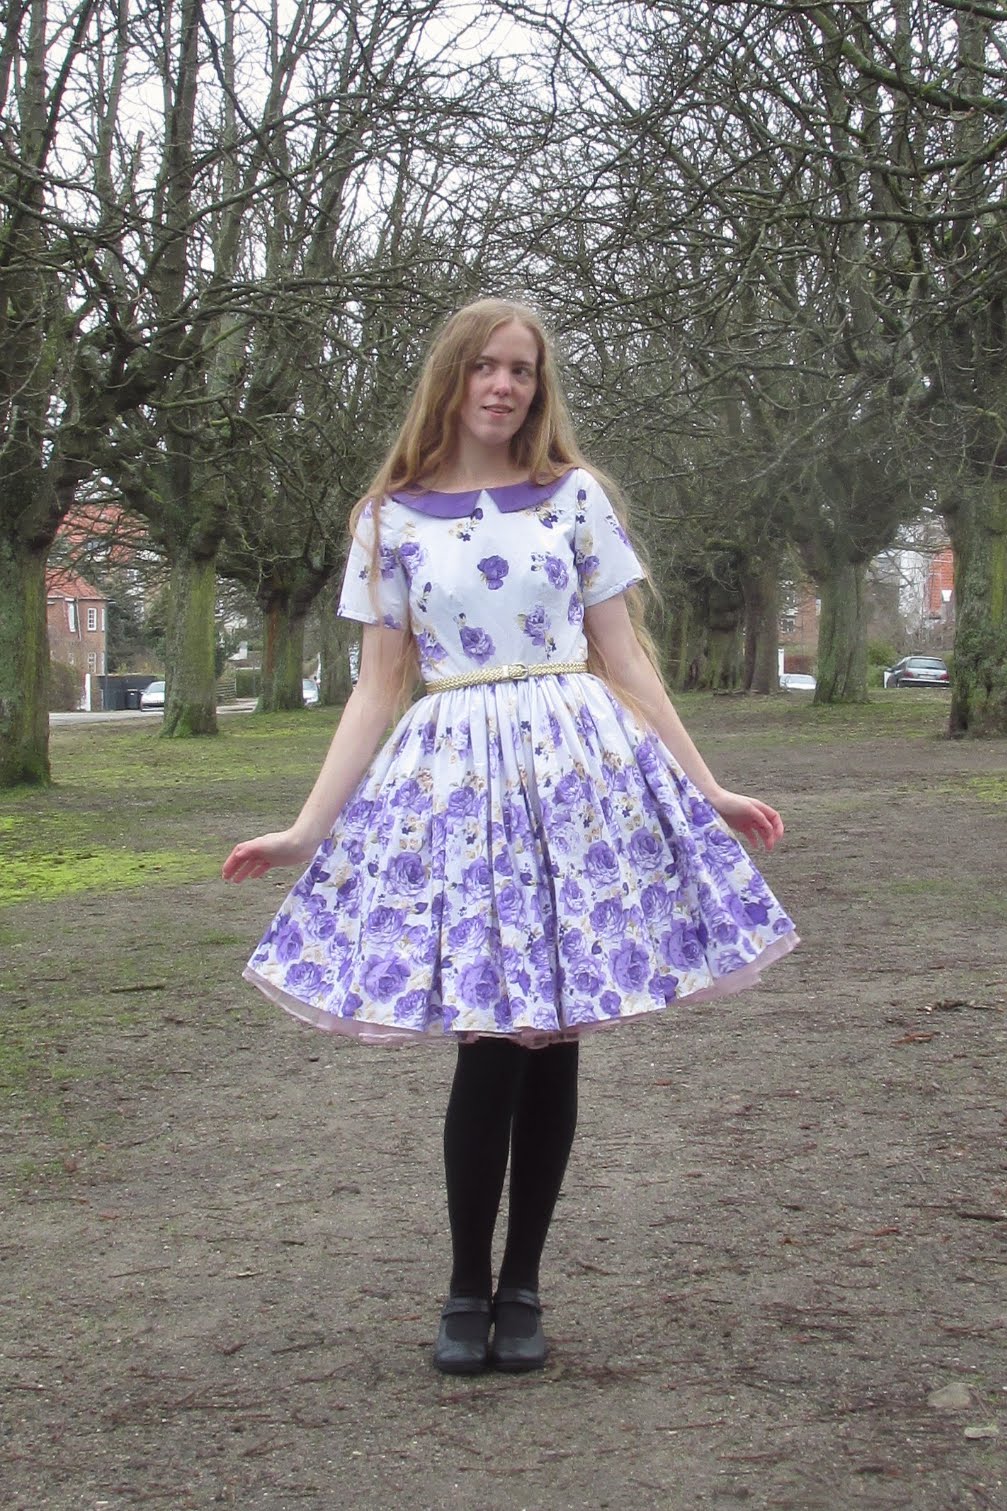
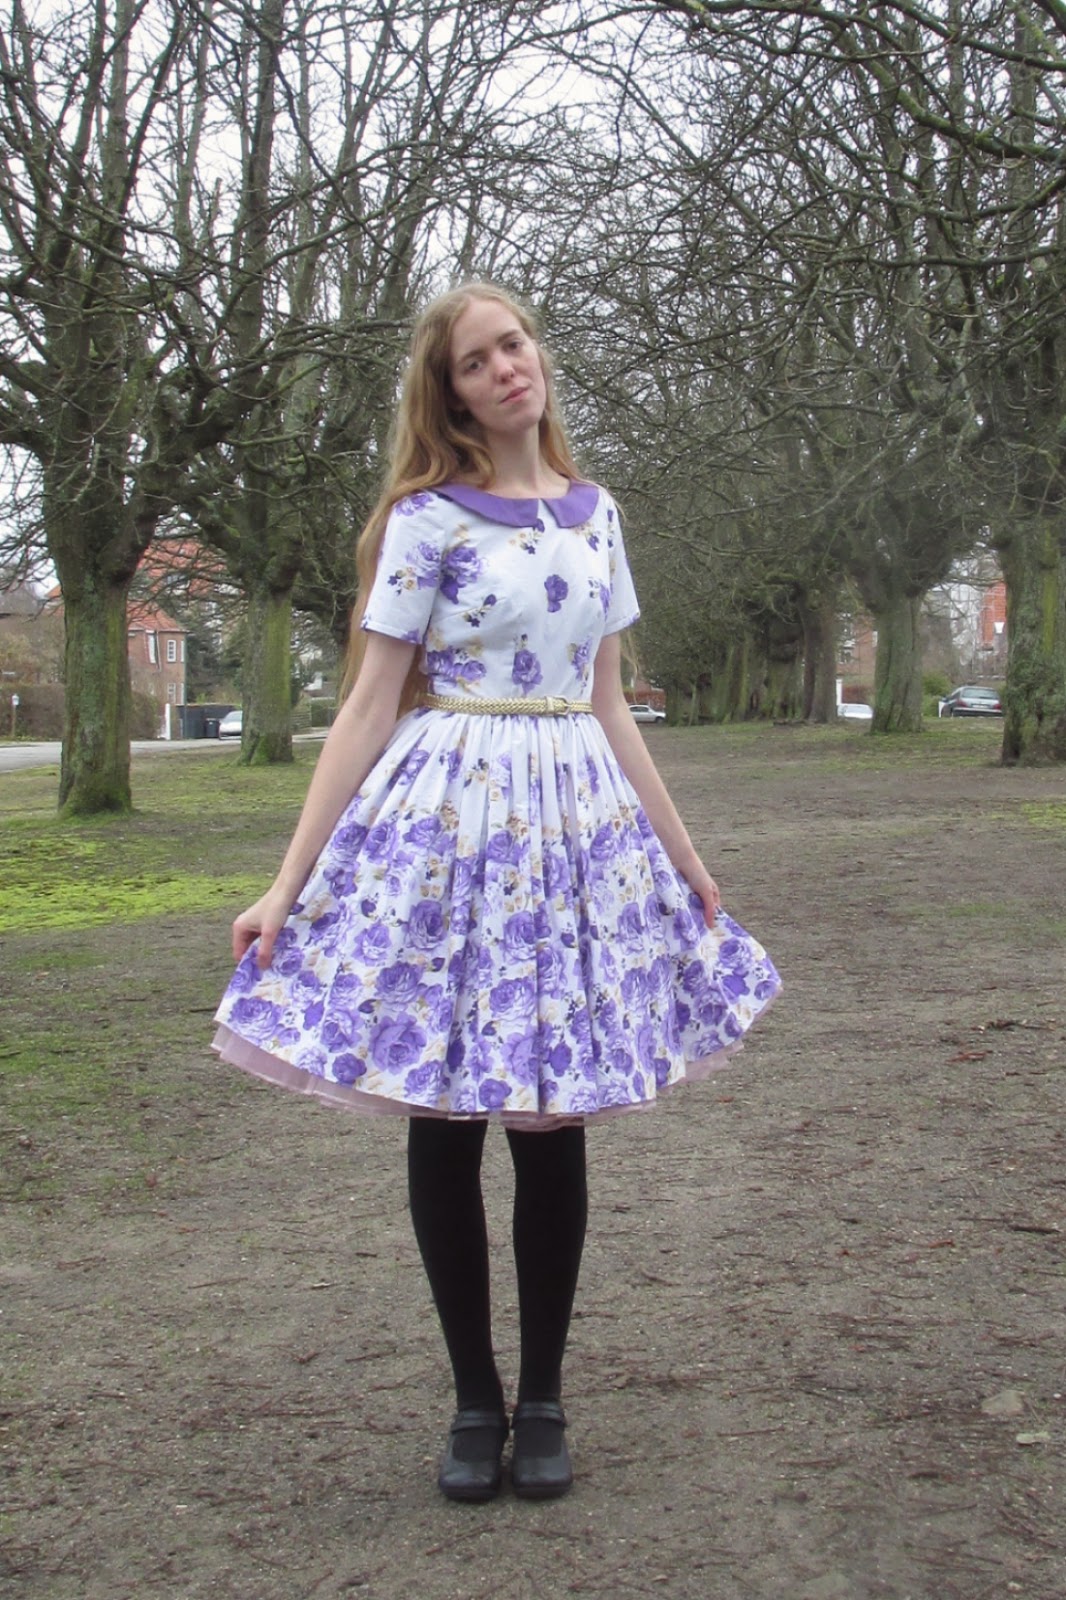
Let me start by saying - this dress has been a long time coming! The fabric was bought during our trip to London in 2015 with this particular project in mind. Then, the first muslin was made back in March 2016 and the fabric was cut out last winter. The dress was mostly constructed back in February and March of this year and was then halted because I needed a different purple fabric for the collar.

This is, of course, the Emery Dress by Christine Haynes, the quintessential classic late-50's-early-60's dress and the ultimate blank canvas pattern to use with crazy printed fabric. I fell in love with this pattern when I saw some beautiful versions online, this and this in particular.


Now, everybody has had rave reviews of this pattern and the miraculous fit straight out of the envelope. For me, this was only the case with the back piece, which to be fair might also just be the best fitting back piece I've ever sewed.
For the rest of the dress, I have so far gone through 4 muslins of the bodice and 5 of the sleeves, whereof the last 3 sleeve versions have been self-drafted. I think the bodice fit is on point by now, but I might never be truly happy with the sleeves.


My struggle with fit is in no way the patterns fault, but instead a consequence of my weird "body quirk" combination:

- narrow shoulder
- sloping shoulder
- forward thrust/rotated shoulder
- hollow chest
- small bust
- round back
- protruding shoulder blades

Notice how these all affect my back, shoulder, and chest. Together, they make it almost impossible for me to be comfortable in woven sleeves without the addition of gathers or pleats. Add to the list, that my arms are super skinny and anything with a bit of ease around the bicep makes my arms look almost sickly thin.


Well, enough about the fit. This dress was always meant to be a "wearable muslin" for the bodice and sleeves. and by that it has met its purpose and I will still wear the dress occasionally.

The fabric was, as previously mentioned, bought during our trip to London in 2015. I got is from a shop on the shopping street in Walthamstow. The fabric was sold as a cotton bedding fabric and was 220 cm wide with the beautiful rose borders on both selvages. I got 1,5 meters for about 4 £.


I used both of the borders for the skirt and cut the bodice and sleeve pieces from the middle part of the fabric. I had to compromise a bit on the skirt length in order to allow enough fabric for the bodice pieces, and the skirt is a smidge too short because of it. For reference, my pink petticoat (24") shows a bit of petticoat at the hem, as shown in these pictures, and my black petticoat (20") gives a bit of a lampshade effect at the bottom. It seems like I need a 22'' petticoat in lilac or perhaps sew a little purple ruffle on the hem ;)

The bodice is interlined in a white cotton batiste, as the bedding fabric is a bit sheer. The pink petticoat shows a bit through the skirt, but it is not too noticeable thank to the gathers.

All in all, I have mixed feelings about this dress. I love the fabric and the bodice fit, but I feel like the sleeves are a bit too restricting for it to be comfortable. I prefer to wear sleeveless dresses and layer them with cardigans when I need the warmth and coverage of sleeves. I will modify the bodice to be sleeveless and report back soon!

If, by chance, you know a magic fix to my sleeve fitting problems, PLEASE let me know!

Yours,
Angelica


Friday, 20 October 2017

Charming Chica


Today, I bring you the last of my holiday outfit photos. These pictures were taken on an early morning tour of the Alcazaba of Málaga, a beautiful eastern-influenced castle ruin from the 11th century. 

It is a well-known fact, that when a seamstress is going on a holiday, no matter the duration or destination, she needs a fresh, new wardrobe to bring with her. And being the seamstress that she is, she is going to make it herself in a matter of days before departure.

That seamstress might be me. 

Luckily, I had a stack of new, fresh summer dresses that hadn't been worn due to the crappy summer weather, so I told myself I only really needed to make this one outfit. 


I made this blouse back in September, just a few days after the pattern was released. It is, of course, the Rita Blouse from Charm Patterns by Gertie.

The fabric was a small scrap of floral cotton poplin bought in a sweet little fabric shop in Flensburg a few years ago. I had about 30 cm of full-width fabric and a handful of medium-sized scraps left and I used every last bit to cut out this blouse. In fact, I had to piece the sleeves, but it is not too noticeable once they have been gathered. 

I made a straight size 6, and I am very happy with the overall fit of the blouse. I can wear it both on and off the shoulders (mostly on the shoulders) and still move around comfortably in it. My measurements were between the 6 and 8, but I sized down after consulting the finished measurement chart and facebook.

I did have to shorten the elastics quite a bit but didn't make any other adjustments.


The skirt is the Zinnia skirt by Colette Patterns. I recently had a lot of unused SeamWork credits burning in my online pocket and used a couple (3 to be exact) on the Zinnia skirt, as I had had my eye on it for a while. I sewed a size 6 and the only adjustment was to swap the waistband pattern piece out with my beloved waistband interfacing tape for a clean look and a slightly narrower width.

I sewed it up in a wonderfully soft, hot pink linen fabric that has been in my stash for about 5-6 years. I had 2 meters of linen and just about managed to save some large scraps for another planned project.

The buttons are from Stof2000. The pattern calls for 10 buttons, but I omitted the last button because I felt it was placed too close to the hem to be really useful.


All in all, I love both Rita and Zinnia, and they make a very cute outfit when put together. I will be making more of both of them, but especially the Rita! I have a lot of ideas for pattern hacks, including long sleeves, dress variations, and neckline ruffles!

Do you also sew last minute garments before a holiday or is it just me?

Have a nice day,
Angelica


Thursday, 21 September 2017

Sewing Statistics - Part I

So, I recently "inherited" this iPad 2 from my boyfriend. He had bought it used from my twin brother around Christmas 2 years ago and found that he just didn't use it enough. So I got to play around with it, MWAHAHAHA.

And what did this sewist do? Installed some nifty sewing apps, of course! And one of them was Cora.

Now, if you don't know Cora, it is most likely because you have Android on your phone. Me too. And Cora only works for iTunes/AppStore/Apple products. Like the iPad 2. Aha!

It is a fabric stashing app, where you can catalog your fabric and then browse through or search it. You can filter your stash by type, weight, wash status, star-markings or by the minimum length your next project will need. The fabrics are beautifully displayed and a long tap on the picture will show the photo in full size while a short tap will show all the details you cataloged it with, including type, fiber content, location, design, length, price, source, colors, wash status and more.


Now, I quickly got addicted to the Cora app. It does cost money to get past the first 5 fabrics added, but it has been worth every penny so far. And 251 fabrics later, I still love it!

It does have 1 little drawback, though. It will tell you just how much fabric you've REALLY got. And it told me that I got a total of 400 meters! Yikes!

At this point, I was halfway in denial. How the h*** do I have 400 meters of fabric?!!! Then, a week later, when the hard truth had settled in, I made a plan.

I will sew up, give away, sell or discard enough fabric, so that I reduce my stash to a total of 300 meters by September 1st, 2018. 
 
And then I went crazy in Microsoft Excell. I have charts and graphs for everything now, stash size, type, and color distribution and spreads just for planning makes and blog posts.

Let me show you :)


Above - stash data taken directly from the Cora app is put in and processed to give a net flux for each month as well as a total for the time period until Doomsday, aka Sep 1st, 2018.


Above - A stash size in meters over time plot with the pink being total, blue being wovens, purple being knits and light pink being others. The points at February and June shows "stash size goals".


Above - Fabric type distribution in stacked percentages. Purple is wovens, pink is knits and blue is others. I have no end goal for this one, I just thought it could be interesting to see. My mother has roughly the reverse distribution of knits and woven than me, for instance.


Above - Color distribution. I didn't know I had so much blue?


Above - A chart of finished make by garment type and recipient. The chart calculates a "selfish rate" that I'd like to keep around the 85-90% as well as a make count for the entire period for each garment type. Joost is the name of my boyfriend, BTW. 


Above - 2 graphs to visualize the makes chart. I love to see them grow as I type in my latest make. 


And lastly, my Makes Planner. The dark pink makes are finished. Light pink ones have been cut out and/or is in progress. White ones are only temporary plans. I love how I can move the cells around as plans change, and how I can see ahead to upcoming projects. It makes pre-washing fabric and buying notions so much easier to do in advance. 

I do find that having the Cora app and keeping detailed statistics keeps me more focused and thus more productive in my sewing. I get a little "kick" every time I get to downsize or delete a fabric, change the color of a cell in the Makes Planner and so forth. I am having way too much fun, people!

So, for now, I will keep the statistics going. I will return on September 1st, 2018 with more statistics, showing you how it all went. Wish me luck!


Monday, 18 January 2016

Slow Sewing

The act of sewing is something I do for me, regardless of who I sew for. It is my happy place, my recharging station and my creative outlet all in one, and I love it. Sometimes I just want to slow down and enjoy a project as it is coming together.

This was one of those projects.


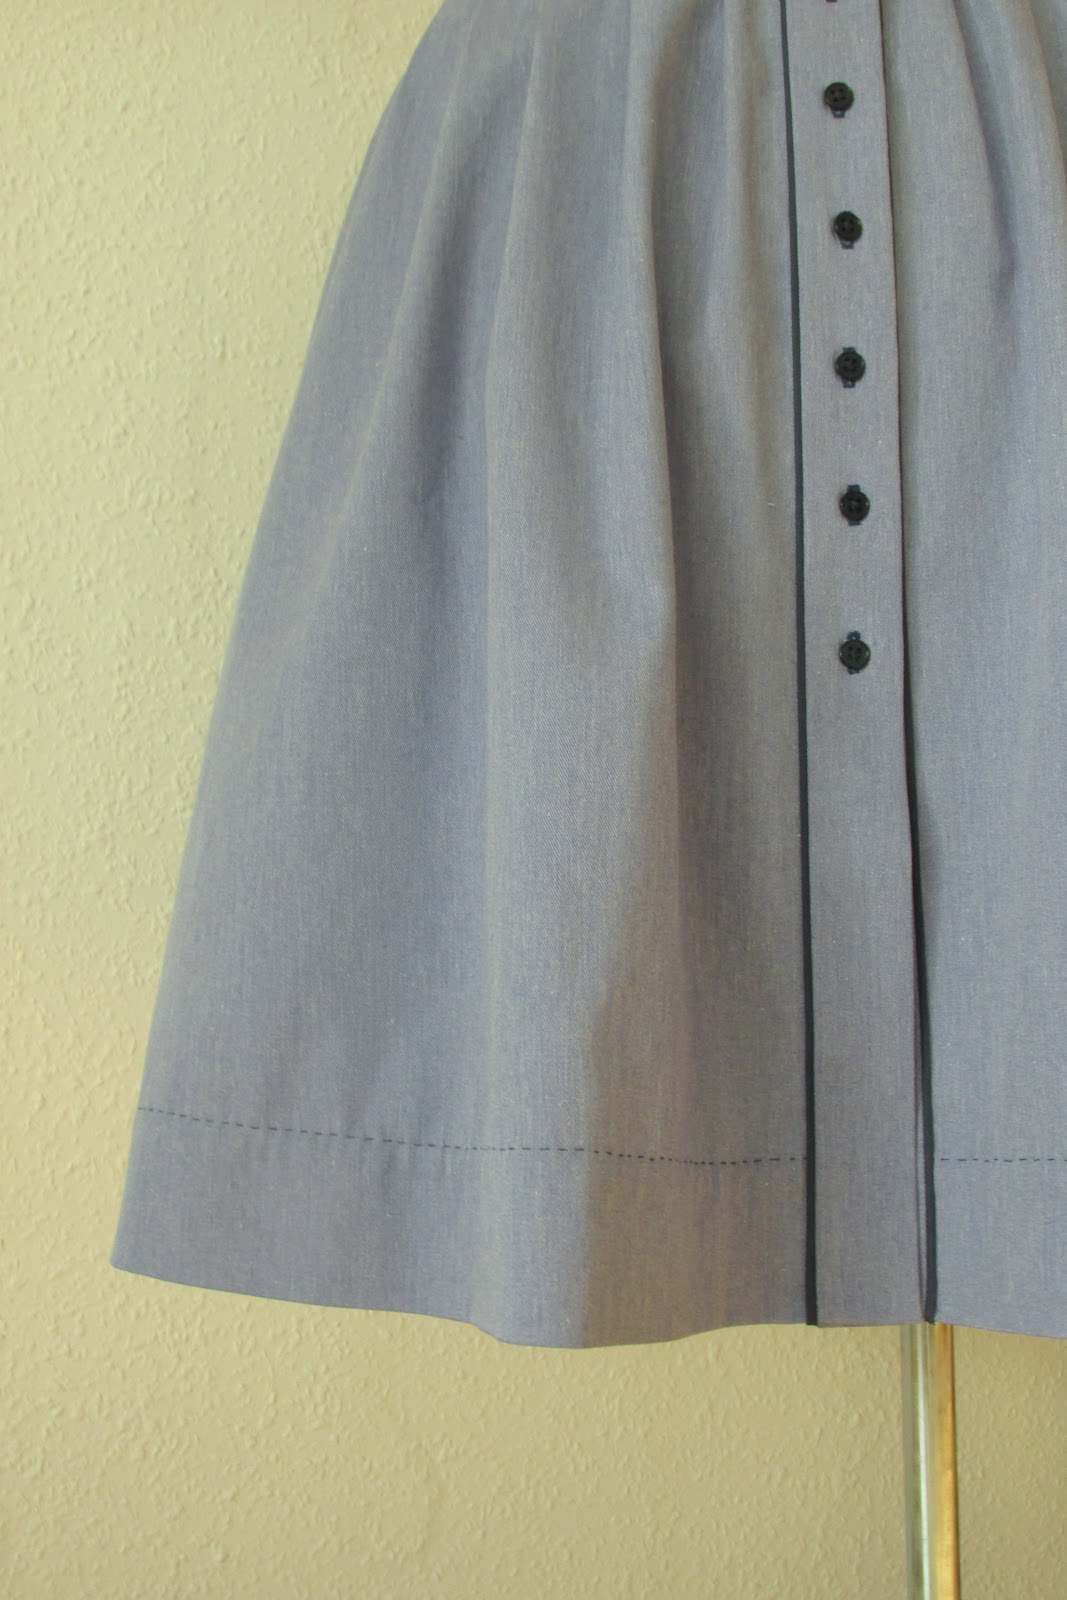
This is M6696, the #1 sewing blogger pattern of 2015. It's a classic and cute shirtdress with both vintage- and mens-wear inspired details and variations, perfect for the intermediate or advanced sewist. 

It may not look that special from afar, but this dress is full of little hand-stitched details.


The most striking feature is perhaps the yoke, being covered in navy sashiko-style embroidery. I first saw this kind of embroidery on Purl Soho, and liked the idea of the simple lines of stitches creating a much more complex pattern. I drew the pattern myself based on the "hana bishi" design and transferred it to my fabric with a transfer pencil. I found the stitching very calming and meditative - just what I needed.


All topstitching is also done by hand with a running stitch to mimic the embroidery. I used a contrasting navy broadcloth to make the piping, bias tape and inner facings for the yoke, collar stands and waistband.


The main fabric is a cotton chambray from my stash, bought 2 years ago at Stoffmarkt Holland as 2 coupons of 1,5 m each. I used one up entirely and a small corner of the second. I think one piece of 1,7 m had been enough for the whole dress. The buttons are from City Stoffer here in Aarhus.


This was not my first time making this pattern. Last summer I had a week long sewcation with my mother and had her help me with the fitting before I made a full, wearable muslin. My measurements put me between size 14 and 16, but based on the flat pattern I made the muslin a size 10 bust with 12 waist/hip. For this version, I took the waist in making it more like a straight size 10.

My only other fit alterations was to remove 3 inches of gathering from center back, rounding the vertical bust dart a smidge and to take a 1 cm wedge out of the bottom corners of the yoke to fit my naturally protruding shoulder blades. In fact, the gathering is not very blousy at all when worn because it sinks into the vale between my shoulder blades. Genetics can be a fun sometimes.


I used the "burrito" method to finish the inside yoke and this tutorial for the collar. The side seams are the only visible seams on the inside, and they are finished on my overlocker.

I really love the finished dress, and more importantly, enjoyed every minute of making it.


Sunday, 15 November 2015

Dirndl Daydreams

Doesn't we all daydream about sewing? About dreamy fabrics and shiny new patterns, about silk and linen and wool, about trimmings and drafting and tailoring and, most importantly, dreaming up an endless list of things we would like to make and wear - like yesterday.

Lately, I have been daydreaming about sewing the perfect dirndl.

I think it started when Gertie posted about her new obsession with the garment, planting a seed in my sub-consciousness. Then my boyfriend started talking about going to Vienna for New Years Eve. Burda had a full-on dirndl feature in the september magazine. Suddenly, I found myself looking through entire pinterest boards full of beautiful dirndls by Lena Hoschek, Julia Trentini and Gössl. Octoberfest came and went, filling Instagram with pictures of beautiful dirndls. Then late one evening, in a moment of weakness, I purchased a pdf version of Burda 7057:


Then I spend an entire evening pulling fabrics from my stash, and came up with these combinations:


In the end, I have settled on the orange/plum color combination (the big picture, top left), as it feels more grown-up and winter appropriate to me than pink, and uses fabric from deeper stash layers. I plan on using the orange linen for the body, the plaid for the full skirt with the beautiful scalloped edge as the hem and the plum taffeta as the apron. The purple linen will become part of the pretty neckline trim and perhaps some matching accessories.

This dirndl has a similar feel and color scheme:
source
So far, I have printed and taped the pattern together and have cut and sewn the first muslin in my usual size 38. I have a good feeling about this one!

Are you sewing any special occasion dresses for the holiday season?


Sunday, 14 June 2015

A Rose is a Rose is a Rose - Flora(l) Saltspring Dress


I will start my back-log of blogging with my most recent make, as I was so extremely lucky as to get some photos of it outside last weekend. I find it really difficult to find interesting and public-but-sheltered places for taking photos, and very awkward to go out and shoot the photos, but was lucky with both this time around.

Back to the dress. This is my wearable muslin of the Sewaholic Saltspring dress, and it ended up exactly as I had hoped it would, if not better! I will confess to not initially liking this pattern when it was released, but my great success with the Cambie, Hollyburn and Tofino made me curious to Tasia's other designs, and I kept seeing really cute dresses Modcloth similar to the Saltspring, so I figured it was worth a try.


I am still not sure if this silhouette is flattering on me or anyone else with bigger hips, but I like it for being a bit different from my other fancier dresses. It is very comfortable, and I feel graceful and feminine in it, despite the lack of more waist definition. I am wearing a obi-style belt in these pictures to define the waist.


The shell fabric is some cheap poly chiffon I bought on our trip to Stoffenspektakel on my birthday last year and the lining is an optic white crepe georgette with a bit of stretch that I was lucky to find as a remnant at Stof&Stil. The shell fabric has really grown on me since last year, and I am happy to finally having made it into something pretty.


I made my usual size 10 and skipped the muslin, but made some small adjustments to the pattern before cutting. I lengthened the bodice lining with 2 cm to comfortably fit my longer torso and shortened the outer bodice with 1 cm to remove 3 cm of the blousing in all. I also eliminated the zipper, as other bloggers reported it unnecessary and made adjustable straps instead of the tie-straps (I slaughtered an old bra for the sliders). I am happy to report that the dress fits really well, and that I can get it on quite easily over my head without the zipper.

The original skirt was also a little slim for my taste, so I used the By Hand London Flora skirt instead. I just made a pleat on the Flora skirt pattern piece until the waist seam fit the Saltspring bodice lower edge, and the skirt width fit my fabric, and cut the hi-low version with an extra 10 cm length. I used the original short skirt pattern pieces for the skirt lining.


I finished the outer skirt with french seams and a tiny baby hem. Everything else is finished with my overlocker and as described in the pattern.

Eliminating the zipper makes this a fast and easy project, even for a beginner. Swapping the skirt and making adjustable straps was the most difficult parts of this dress, and those were my own add-ons.
This has definitely been an experiment in silhouette for me, and I might not make another one of these for a while. Until then, I'm off to sew ALL THE COTTON DRESSES! Bye!


Wednesday, 28 January 2015

Regency Beginnings: HSM "Foundations"

This is my first ever entry for the Historical Sew Monthly/Fortnightly. I had my eyes on some other participants historical makes all of last year, so when the format changed from fortnightly to monthly, I jumped in with both feet.

This was not my first choice of project for this months "foundations" challenge, but 3 other projects, all corsets, had to be postponed due to lack of time and materials. 

The 18th century stays might get done for next months "blue" challenge, the busk for my victorian corset has not yet arrived in the mail and I simply didn't have time to make regency stays as I had already wasted most of January making muslins for the other 2 corsets. 

Luckily, I also needed a new chemise to kick-start my regency wardrobe :D


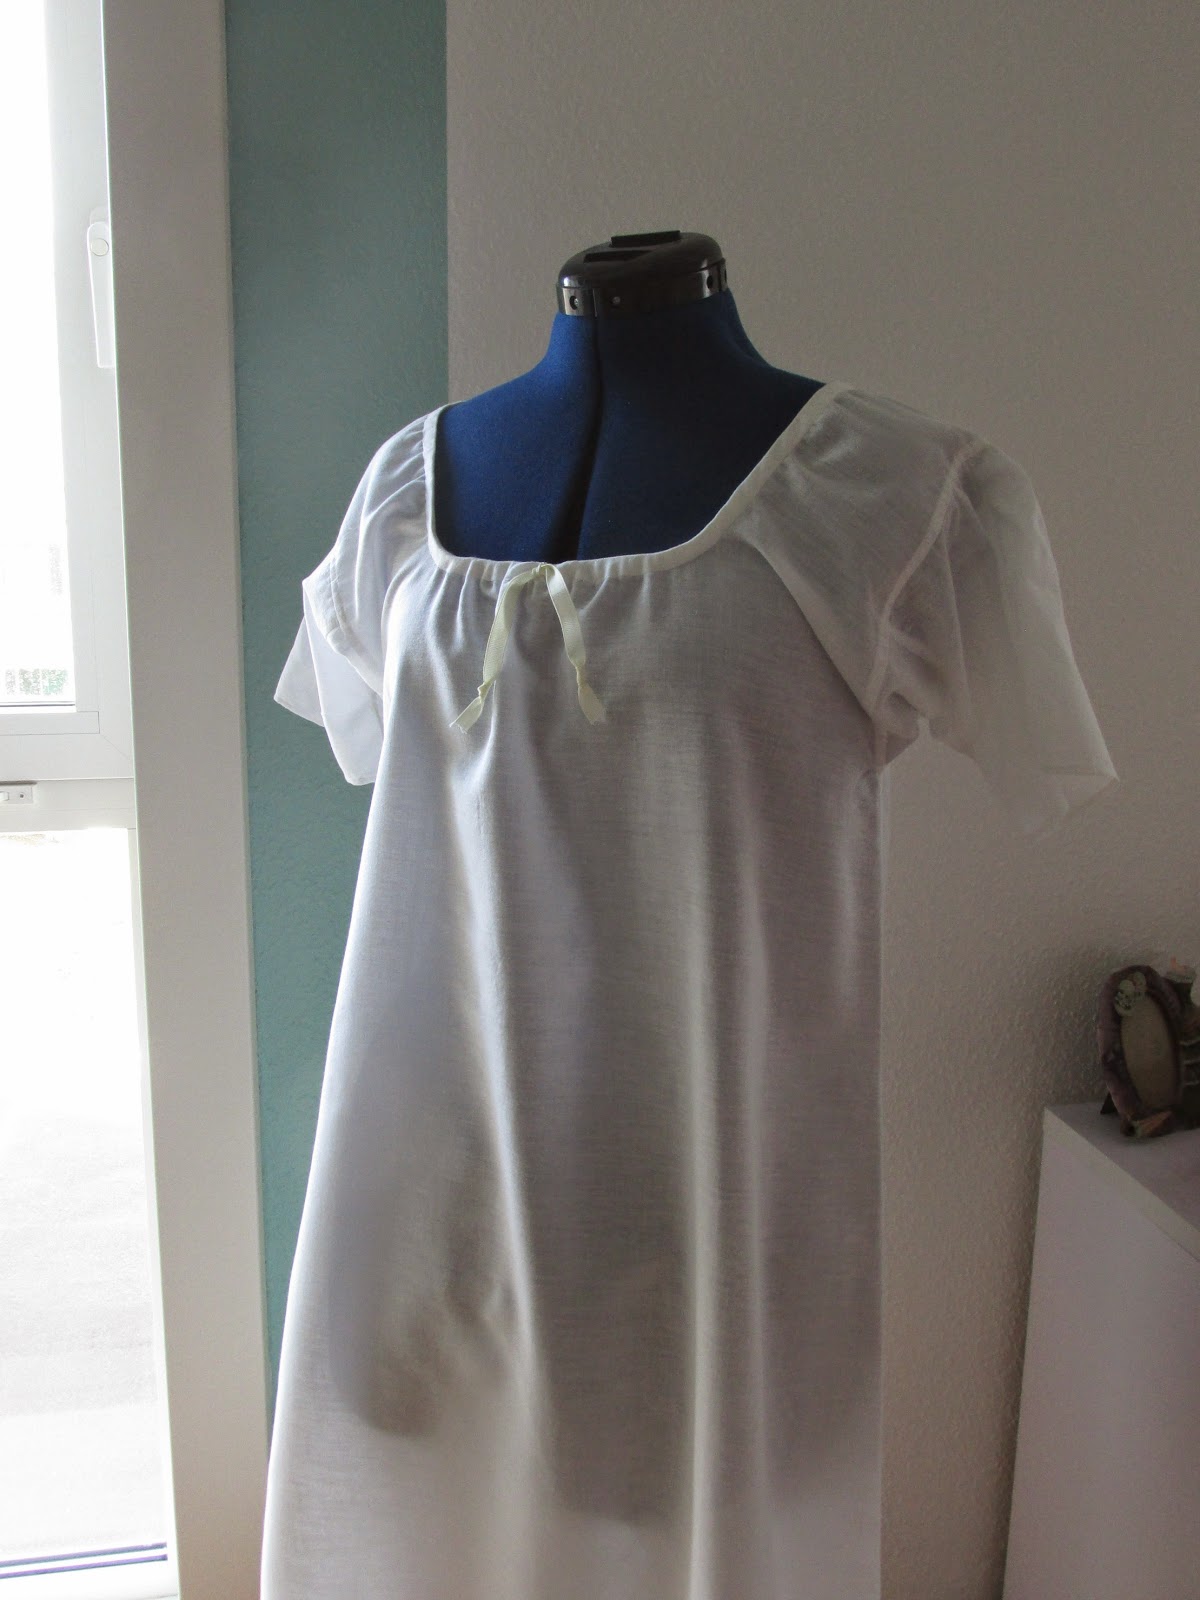
A chemise is the inner-most layer of clothes. It keeps sweat, body oils and dirt away from the non-washable stays/corset and more precious outer dresses and gowns. When making costumes from the skin out, it is the first garment to make and fit other clothes over, making it the "foundation" on which every other garment is made ;)


This chemise is made to go under regency stays and dresses, but it is an almost timeless shape that can be used for anything between Elizabethan and mid-19th century without problems. 

The fabric is an old cotton Ikea bedsheet that I found in my fabric stash. It is the perfect fabric for chemises: soft, lightweight, tightly woven, breathable and slightly sheer. It has already been washed and tumble dried many times before, so it is easy to wash after events.

Seam at the back due to the period cutting. 

For the pattern, I used this lovely tutorial, in size C but used the shoulder measurements between the B and C sizes, as my chest is 36 inches. I used the "period cutting layout" on my wider-than-normal bedsheet fabric, and lowered the front neckline 2 cm after the first "fitting".
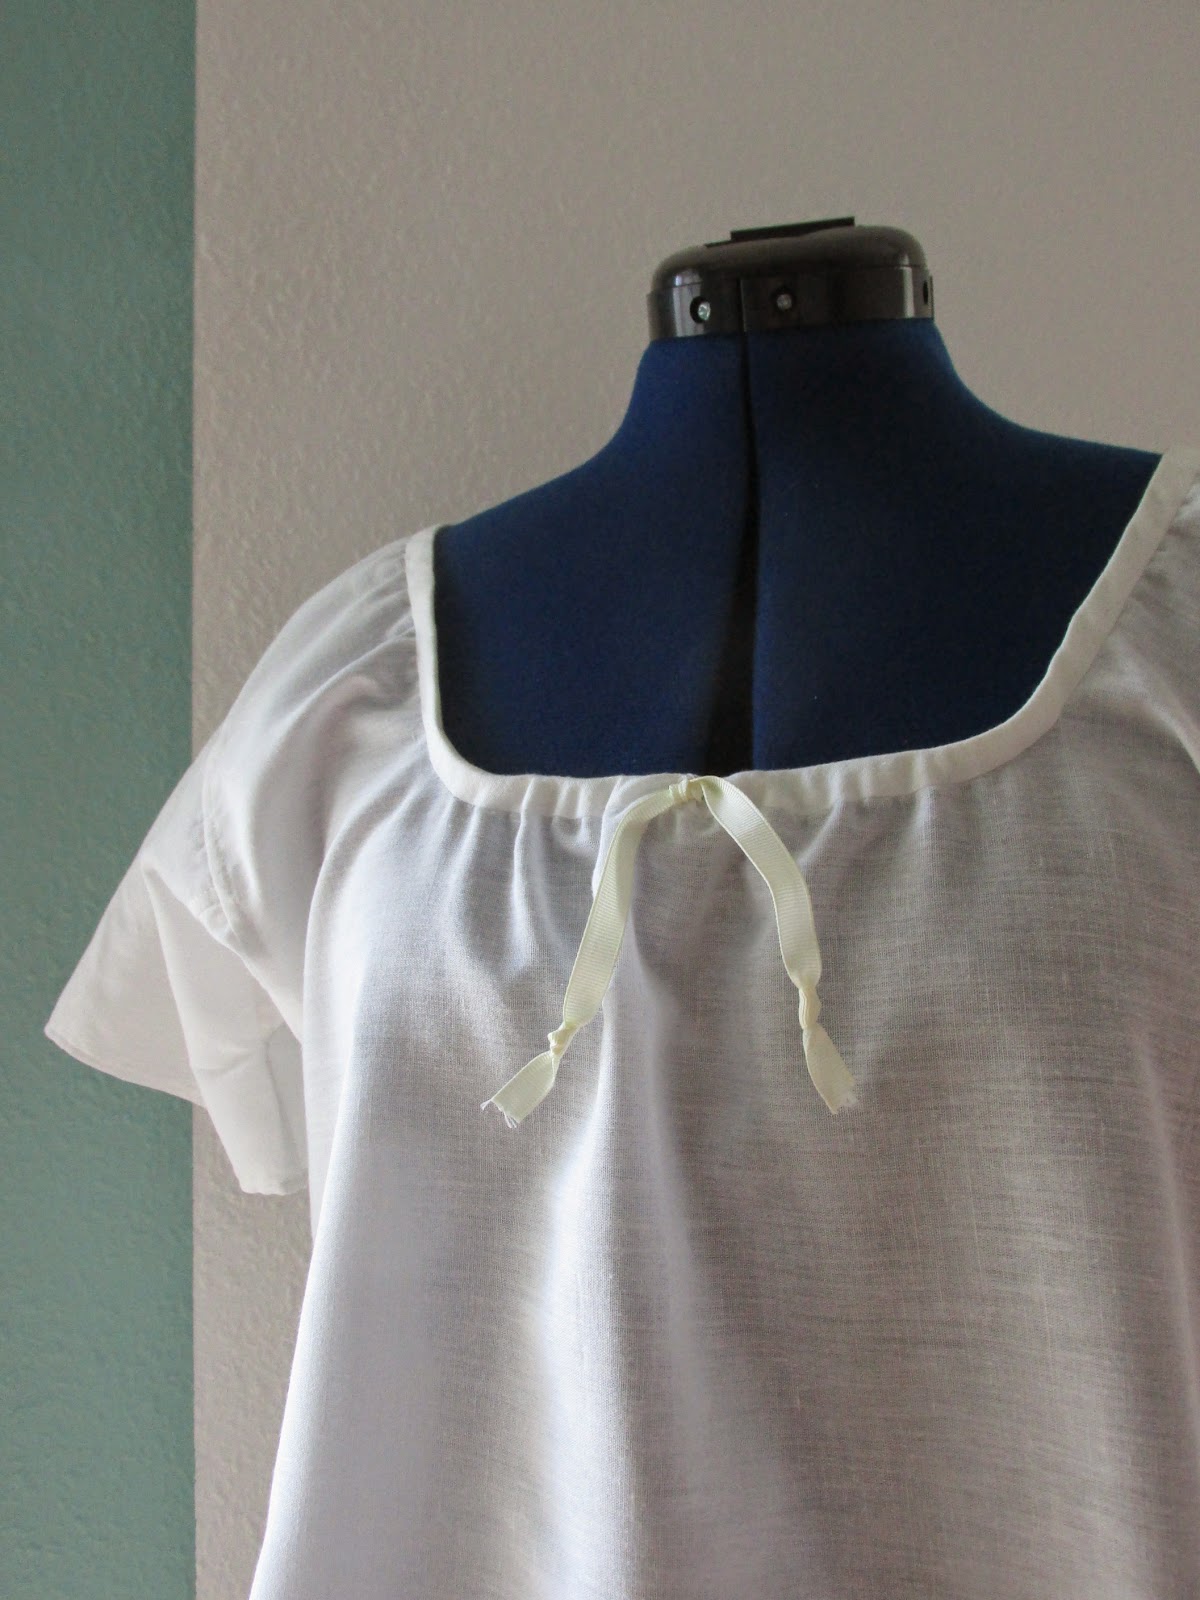
I made my own self-fabric bias tape for the neckline. I put a narrow, off-white grosgrain ribbon in the neckline drawstring, but I might replace it when I find something more suitable.

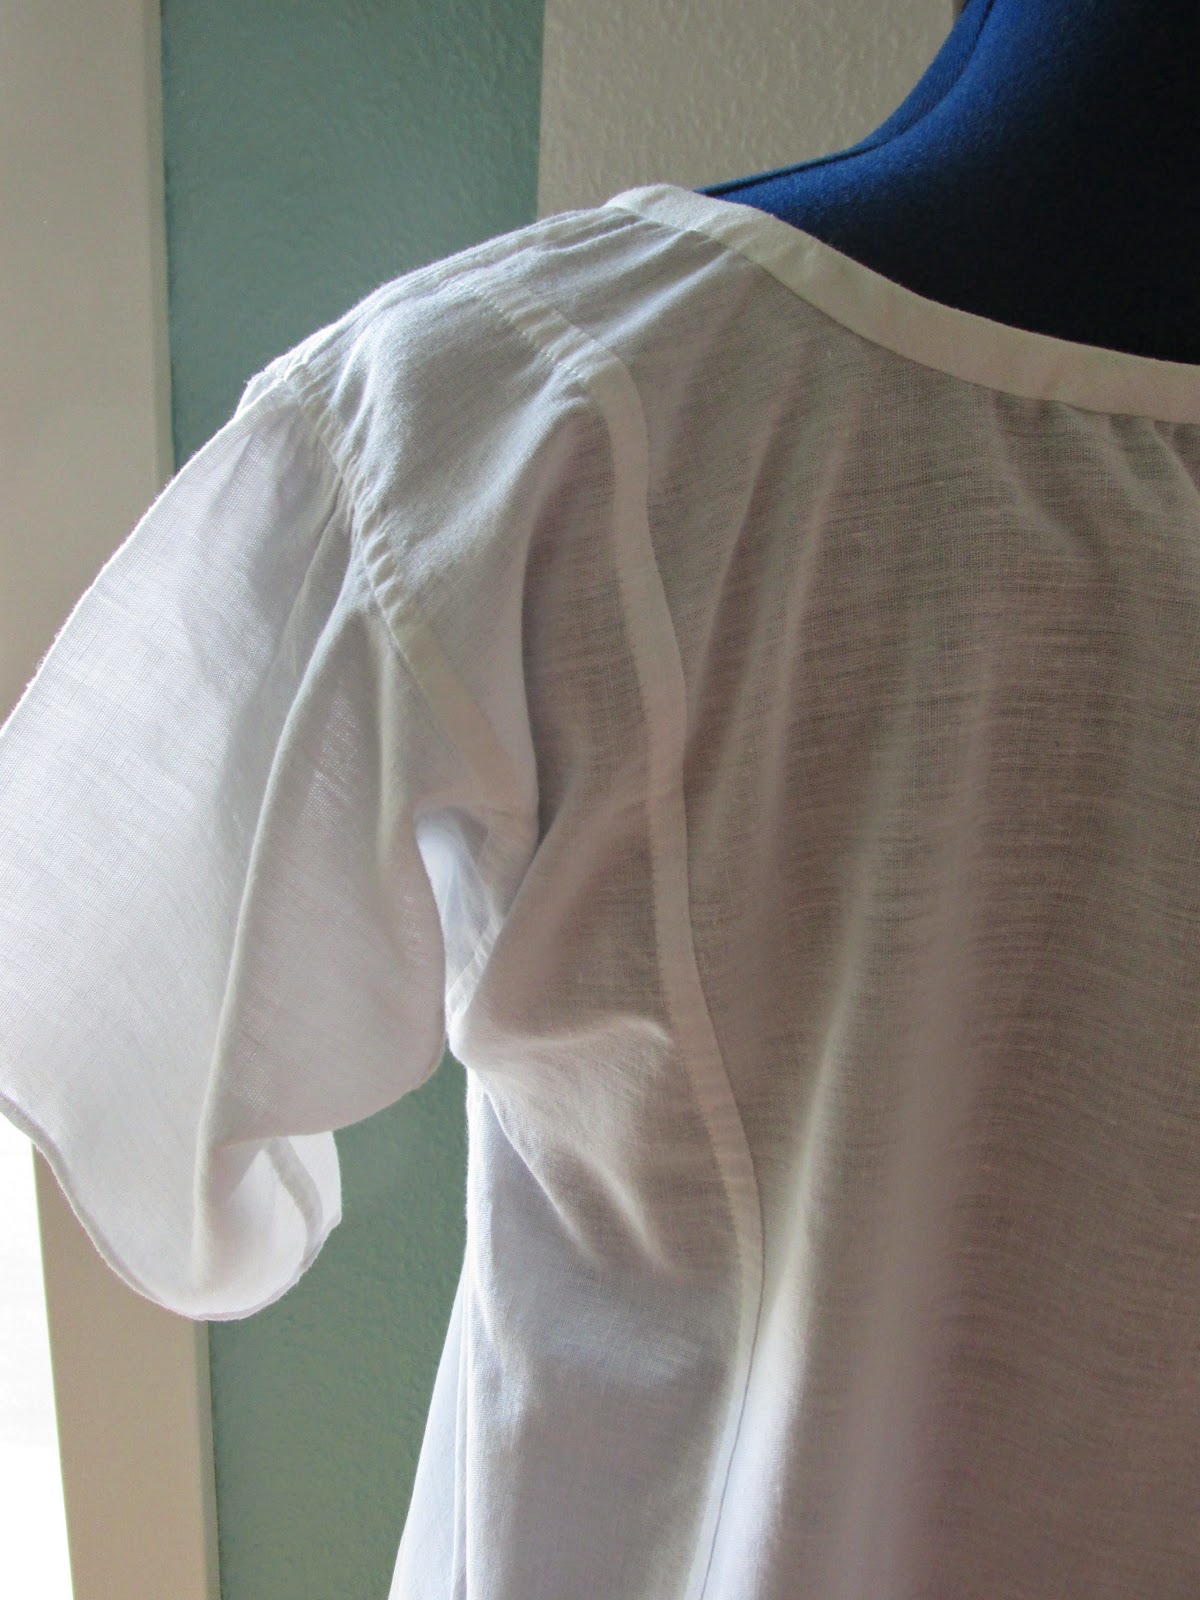
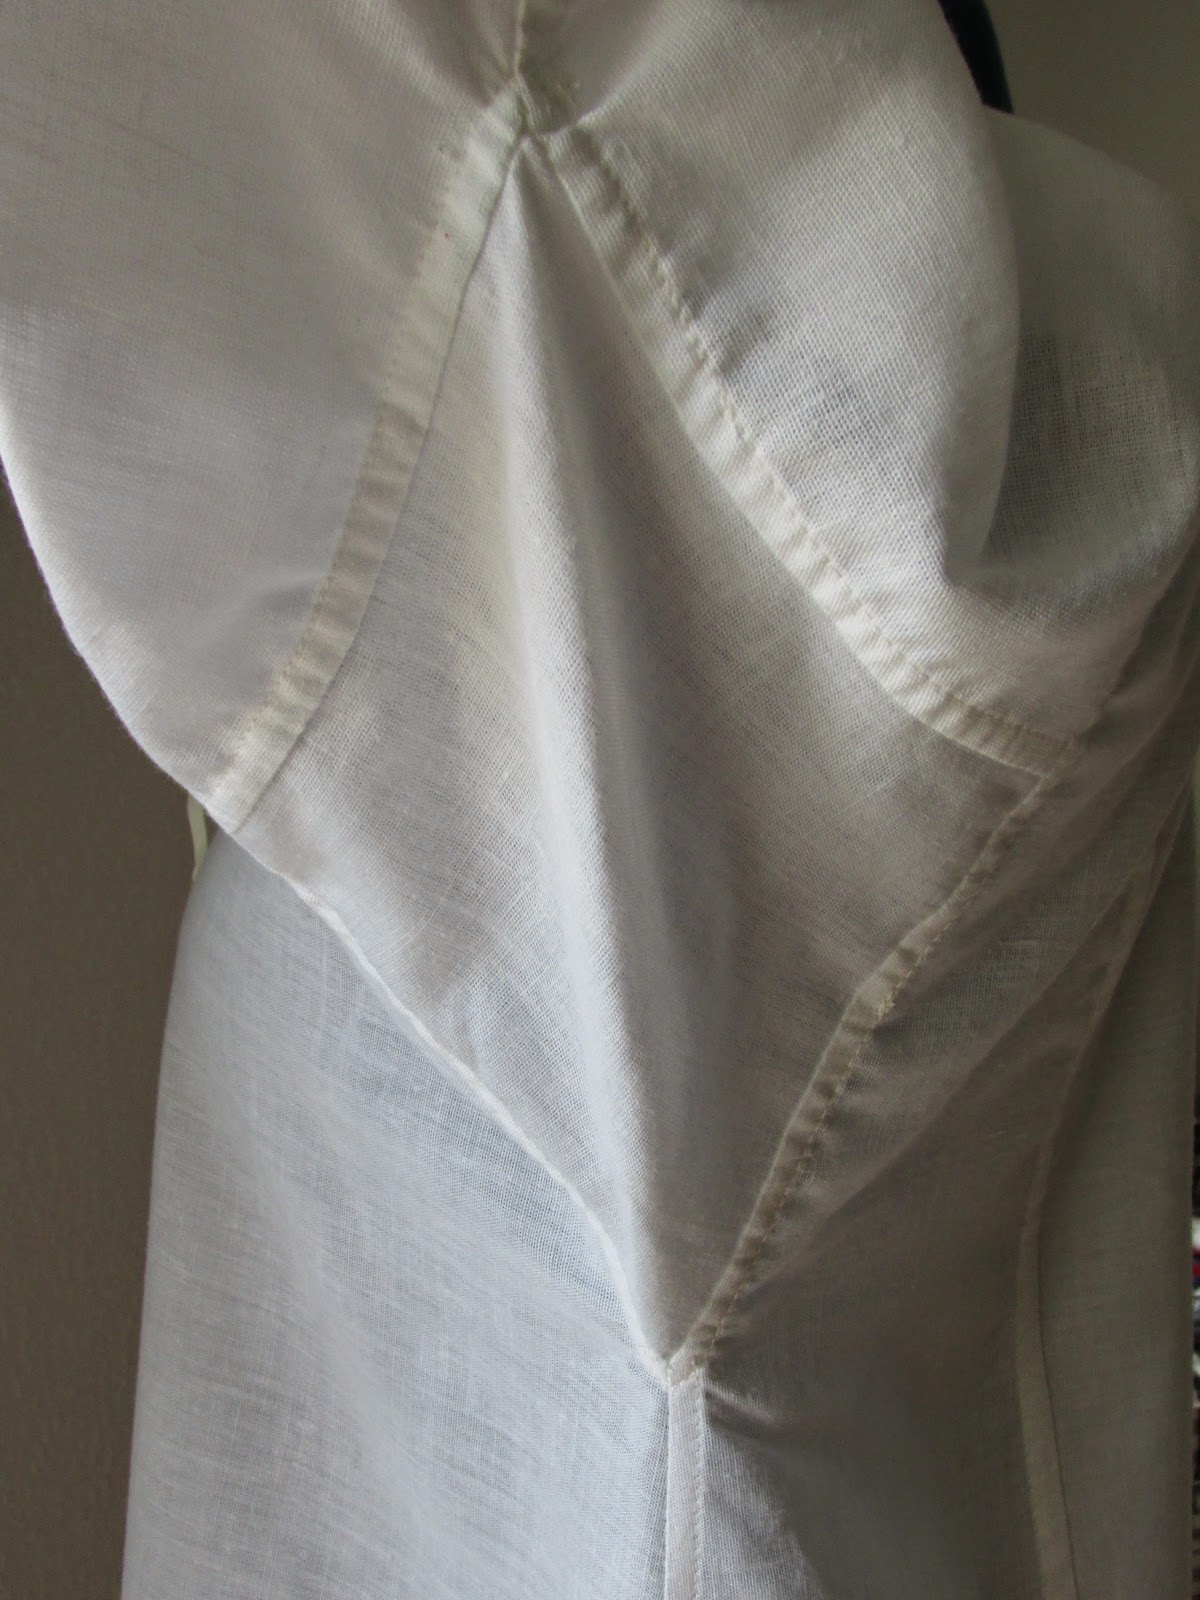
Sleeve gusset. Flat-felled seams all around :D

The fit is a little big on me, but otherwise fine. Next time I might just make the smaller size (B) and make the sleeves a bit narrower and perhaps without the gathering. 


I sewed most of the chemise on my sewing machine and did the eyelets and finishing of the bias tape by hand. I used the recommended 1,2 cm seam allowance throughout and flat-felled all seams. 

It was oddly meditative sewing the (very long) flat-felled seams, and I am happy to have replaced my old chemise with a newer and more lightweight model. Next project: corsets!


The Challenge: Foundations (January 2015)
Item: Regency chemise
Fabric: An old Ikea cotton bedsheet
Pattern:  Online tutorial
Year: ca. 1800-1810 but suitable for 1600-1850
Notions: 1 m off-white grosgrain ribbon for drawstring. White polyester thread. Bias tape maker.
How historically accurate is it? 50 %? The fabric, cut and sewing techniques are all fairly accurate, but the "modern" sewing machine wasn't invented until the 1840's.
Hours to complete: about 6 hours of active sewing work spread over a weekend.
First worn: For fittings only. To be worn this summer.
Total cost: All stash and re-cycling materials, so I'm counting it as FREE!